Introduction #
In the Qilowatt app, the device must be configured with the correct data. This ensures that the system recognizes the device, links it to the correct electrical device, and displays the measurement data correctly.
Prerequisites #
• A Qilowatt account has been created → Creating a user account
• The device is connected to WiFi → Connecting the device to WiFi
• The Qilowatt app is open and device setup has been started
• The device is connected to WiFi → Connecting the device to WiFi
• The Qilowatt app is open and device setup has been started
Step-by-step Guide #
1. Selecting the device #
• From the app open Dashboard.
• Find the device Qilowatt XXX (example: Qilowatt Modbus R2).
• Find the device Qilowatt XXX (example: Qilowatt Modbus R2).
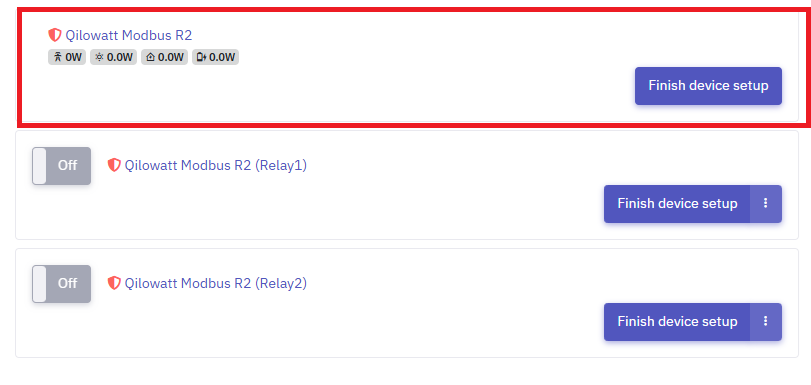
• Click Finish device setup.
• Select the type of electrical device and click Go to setup.
Example:
• Select the type of electrical device and click Go to setup.
Example:
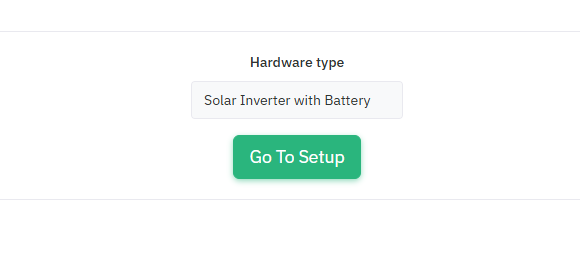
For an inverter, you can choose between two setups:
• Solar Inverter
• Solar Inverter with battery
2. General #
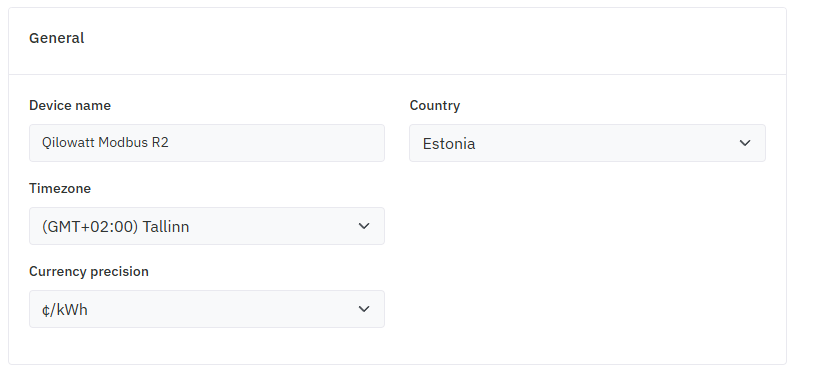
• Device name: Assign a name to the device (example: Home inverter).
• Currency precision: Information can be displayed in €/kWh or c/kWh.
• Click Next.
• Currency precision: Information can be displayed in €/kWh or c/kWh.
• Click Next.
3. Vendor and model #
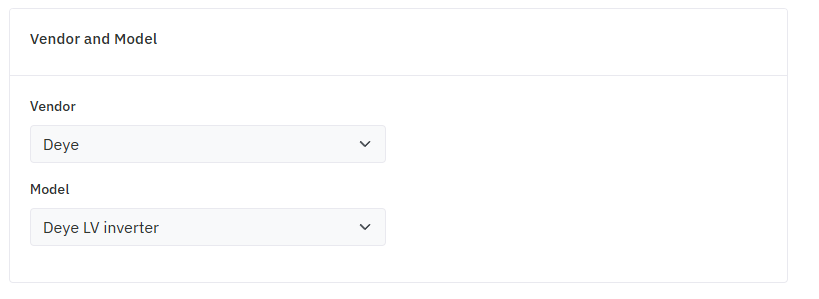
• Vali elektriseadme tootja ja mudel.
• Klõpsa Next.
• Klõpsa Next.
if you choosed Solar Inverter with Batteries you will be continuing with Plant setup.
4. Plant setup #
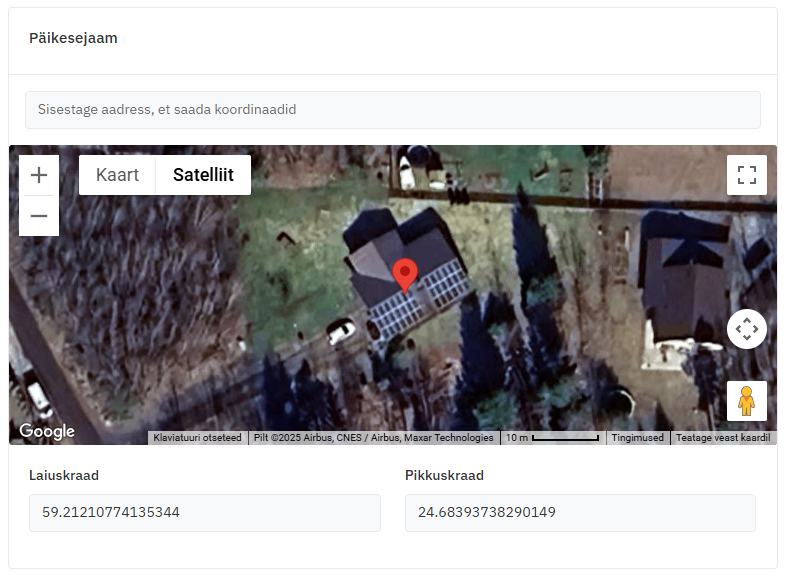
• Enter the address and drag the GPS pin to the exact location where the solar panels are installed.
• Click Next.
• Click Next.
5. Inverter #
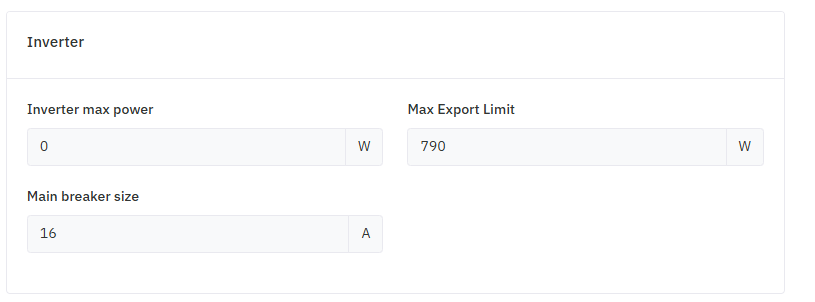
• Inverter max power – maximum power in device operation mode.
• Main breaker size – according to the electrical connection box.
• Max export limit – according to the contract with the grid operator (e.g., for nano-producer 790 W, if no contract → 0).
• Click Next.
• Main breaker size – according to the electrical connection box.
• Max export limit – according to the contract with the grid operator (e.g., for nano-producer 790 W, if no contract → 0).
• Click Next.
6. Plane #
• Click + Add group.
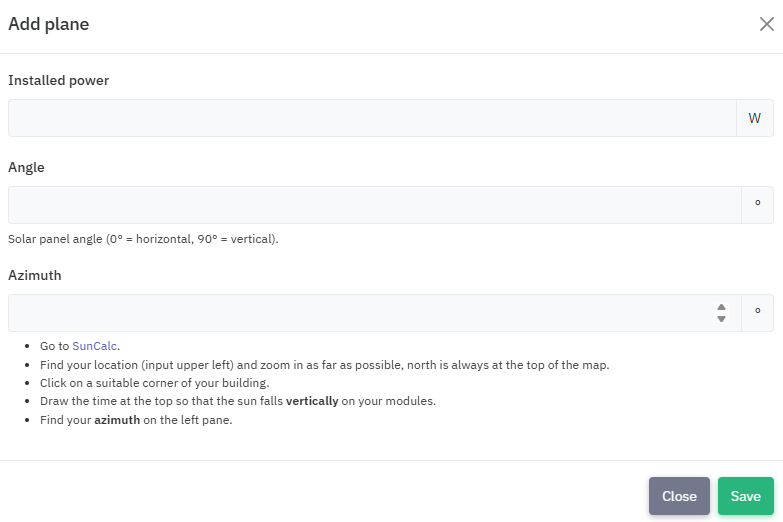
• Installed power – plant’s total power in W.
• Angle – tilt of the panels relative to the ground in degrees
• Azimuth – orientation relative to compass direction in degrees. For easier azimuth setup click Go to SunCalc
• On the SunCalc page, you will see the address you entered earlier in step 4. Solar plant. Make sure the GPS pin is centered on the panels.
• At the top row of the browser window, you will see a time range 00:00–23:00
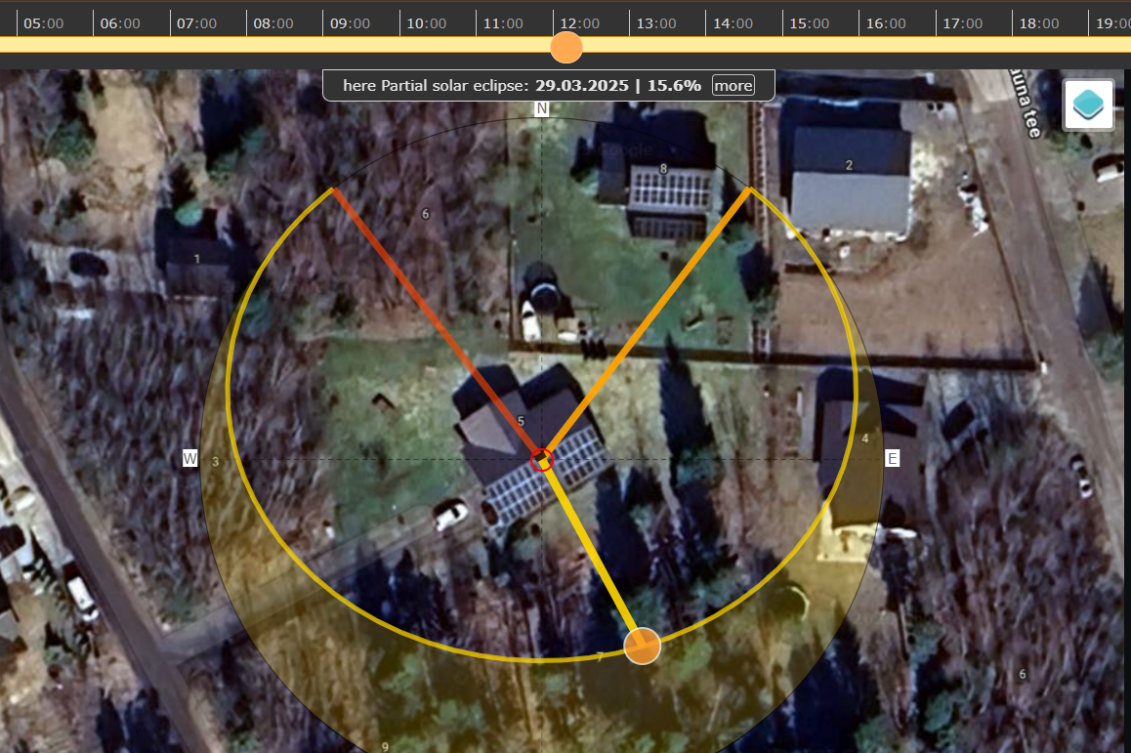
• Move the cursor along the timeline until the yellow line is perpendicular to the panels, as shown in the photo.
• On the left panel, the table will display your panel’s azimuth.
• Reopen the Qilowatt device setup page, enter the azimuth obtained from SunCalc.
• Click Save
The final result looks like this:
• On the left panel, the table will display your panel’s azimuth.
• Reopen the Qilowatt device setup page, enter the azimuth obtained from SunCalc.
• Click Save
The final result looks like this:

If additional solar panel ‘parks’ exist at different azimuths, repeat the procedure by clicking +Add group and enter the data.
7. Battery #
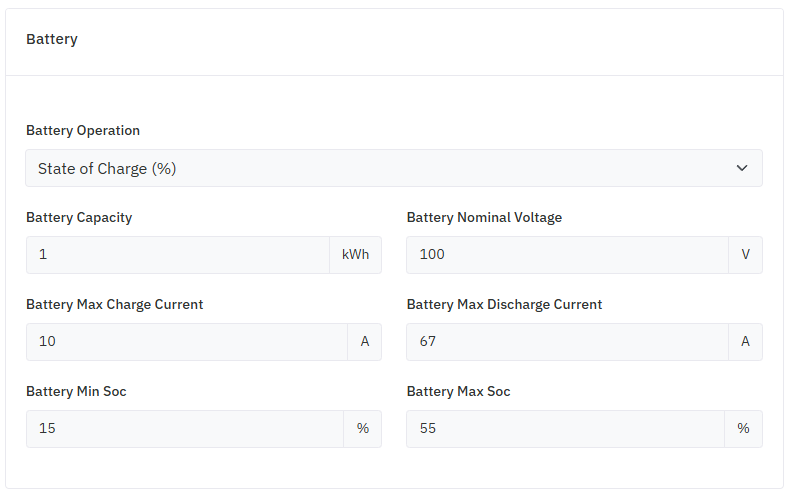
• Battery operation – choose State of Charge (%) or Voltage
• Battery capacity – kWh
• Battery nominal voltage – voltages
• Battery max charge current – In amps when batteries are charged thru power grid or plant
• Battery max discharge current – In amps when you sell it to the power grid
• Battery Min Soc – Battery minimal discharge %
• Battery Max Soc – Battery maximal charge %
• Click Next
8. Energy margins #
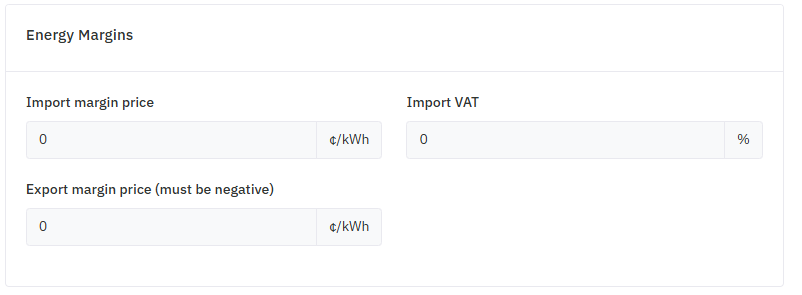
Purchase margin (c/kWh) consists of three components:
• Margin added by your energy seller to the market price
• Electricity excise duty
• Renewable energy fee
• Margin added by your energy seller to the market price
• Electricity excise duty
• Renewable energy fee
Purchase VAT:
• Individual – pays VAT on purchase price (depends from local tax regulation)
• Company – depends from local tax regulation
• Individual – pays VAT on purchase price (depends from local tax regulation)
• Company – depends from local tax regulation
Sales margin:
• The sales marginal must be negative.
• This is the commission you pay to the energy buyer.
• For example, if the sales margin is 0.007 €/kWh, enter -0.7 c/kWh.
• If you receive renewable energy support (for plants built before the end of 2020), enter the value as 0.
• The sales marginal must be negative.
• This is the commission you pay to the energy buyer.
• For example, if the sales margin is 0.007 €/kWh, enter -0.7 c/kWh.
• If you receive renewable energy support (for plants built before the end of 2020), enter the value as 0.
• Click Next
9.Tariffs #

• Select your service provider from the column and verify the grid fee parameters.
10. Final step #
• Click Next.
• The data will be loaded, and you will be directed to the Dashboard, from which you can view the device parameters.
• The data will be loaded, and you will be directed to the Dashboard, from which you can view the device parameters.
Result #
The device information has been successfully configured, and the Qilowatt system displays measurement data correctly and applies control logic.
If it Doesn’t Work #
• If the device does not appear in the list, check if it is connected to the WiFi network.
• If the data is not displayed, try closing the app and opening it again.
• If the problem persists, please contact our team: support@qilowatt.eu
• If the data is not displayed, try closing the app and opening it again.
• If the problem persists, please contact our team: support@qilowatt.eu


