Introduction #
Solis S6 inverters can be connected to the Qilowatt system via Modbus communication. This guide explains the necessary preparations, RS485 wiring, inverter settings, and operating modes.
Prerequisites #
• Inverter and battery firmware are updated (latest version must be used)
• A Modbus module is available
• Required tools and a communication cable (CAT5 or CAT6)
• A Qilowatt account has been created and the app is ready for adding devices → Creating a user account
• A Modbus module is available
• Required tools and a communication cable (CAT5 or CAT6)
• A Qilowatt account has been created and the app is ready for adding devices → Creating a user account
Step-by-step Guide #
1. Preparation #
• Update the inverter and battery firmware before connecting.
• Ensure the device has the latest firmware, since Qilowatt always relies on the newest Modbus protocol.
• Ensure the device has the latest firmware, since Qilowatt always relies on the newest Modbus protocol.
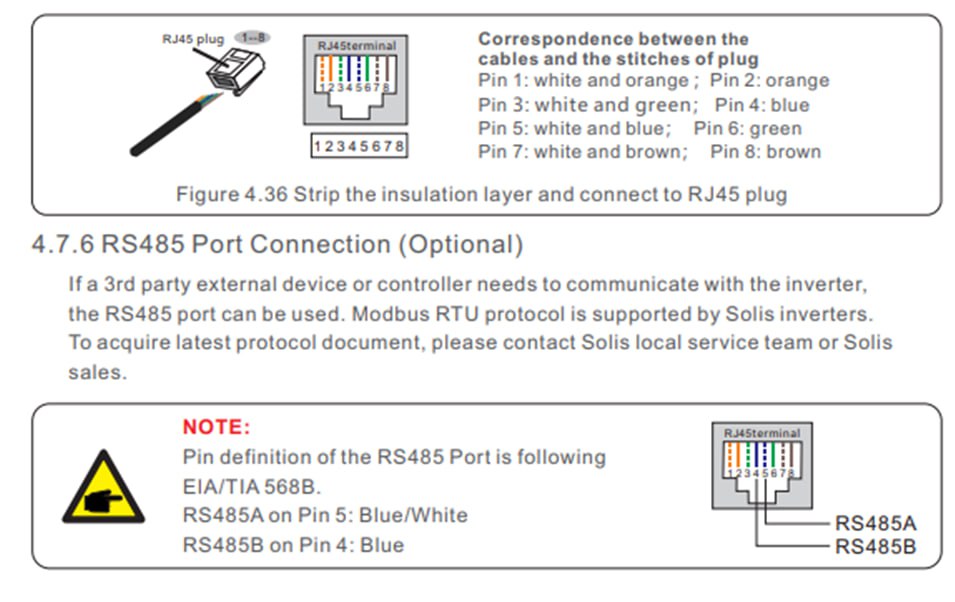
2. RS485 connections #
↓ Solis S6 3-10kW HV; Solis S6 8-15kW LV ↓
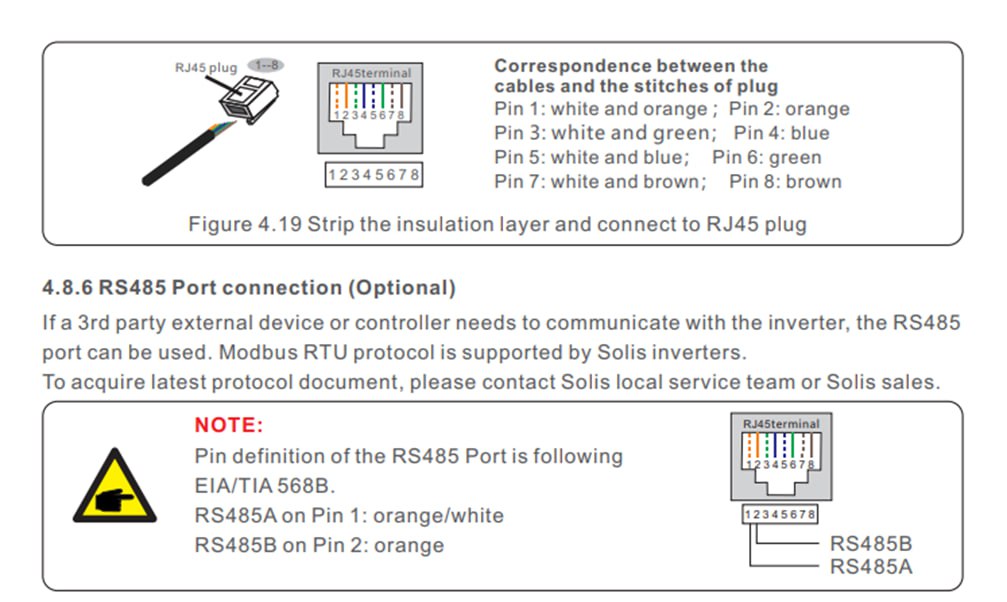
↓ Solis S6 12-20kW HV ↓
Solis S6 30–125 kW must be connected to the EMS port, not RS485. (If the battery is a Dyness BF100, the Qilowatt controller must be connected to the EMS port, the battery BMS cable to the BMS port, and the battery EMS cable to the RS485 port.)
3. Inverter firmware and SolisCloud settings #
It is critical to update the inverter firmware after installation.
All firware components must be updated: DSP firmware, HMI firmware, Major firmware and all other inverter firmware components.
All SolisCloud control functions must be turned OFF.
If any of the following functions are enabled in SolisCloud, it is not possible to control the inverter.
1) Solis AI, Peak Valley Arbitrage, Solis EMS and other automatic control functions must be turned OFF.

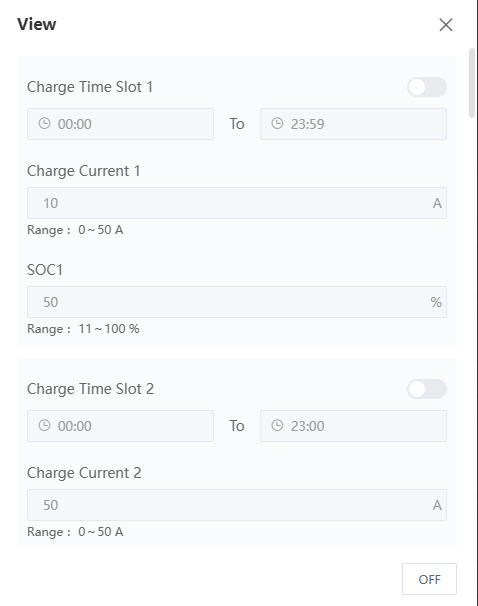
2) Storage Mode → Charge & Discharge time slots must be turned OFF.

3) We recommend turning OFF Battery Saving, located under Battery Settings. This setting limits battery usage and reduces charging and discharging power.

4) We recommend turning OFF Battery ECO Function, located under Settings -> Function Settings. With some battery systems, it is not possible to charge the battery when it is empty and no PV production is available.

Result #
Solis S6 inverter is successfully configured and connected to the Qilowatt system. The module transmits data and enables inverter control and energy optimization.
If it Doesn’t Work #
• If communication does not work, check the RS485 connections
• If the issue persists, contact our team: support@qilowatt.eu
• If the issue persists, contact our team: support@qilowatt.eu


